
Beginner’s Guide to Gua Sha: Tools, Techniques, and Tips
This blog post is all about gua sha! Discover everything you need to know about the ancient beauty technique right here.

Gua Sha is not a new phenomenon. This ancient health practice has been around for centuries (more on that later) but lately, it’s been gaining more attention and popularity. You may have noticed it popping up on TikTok, or perhaps your local beauty spa now offers gua sha face massage as part of facials. However you got to this page, you’re probably wondering what all the fuss is about, and more crucially, is it something that could work for you.
I was also asking these questions. As someone with jowls slowly dropping with every birthday that passes, I have invested a lot of time, energy and money into exploring any treatment or device that claims to “lift” and “sculpt.” Naturally, gua sha was on my radar and I’m happy to report back my findings. This guide will give you everything you need to know about gua sha for beginners: from tools to techniques, plus some top tips on how to use gua sha for glowing skin.
What is Gua Sha?
Gua sha is a practice from ancient Chinese medicine that uses a natural stone (usually jade or rose quartz) to gently scrape the skin to stimulate blood flow, release pain and improve lymphatic drainage in the body. Traditionally, it was used to boost overall wellbeing, however today gua sha is recognised for its face massage benefits.
The most common modern-day use of gua sha focuses on lymphatic drainage face massage techniques, which can help to reduce puffiness, lift cheekbones and leave the skin glowing and radiant. As a result, many are using gua sha as part of their everyday skincare ritual, claiming it’s one of the best natural ways to depuff face and neck.
The Benefits of Gua Sha
Gua sha performed correctly stimulates facial lymphatic drainage, releasing water retention in the face, jawline and neck. The results are immediate, and your face will instantly look less puffy and inflamed. This action will also improve blood flow, which in turn gives your skin a natural flush and glow. More gua sha facial benefits include easing muscle tension and headaches, promoting relaxation and stress relief.
Some report that gua sha can help sculpt facial features over time, but I think it’s important to manage expectations with this one. I’ll share more on my personal experience with gua sha later in the article.
Choosing the Right Gua Sha Tool
Traditionally in Chinese medicine, healing natural stones were used as a gua sha tool: jade, renowned for its balancing, cooling and circulation-boosting properties, and rose quartz which is soothing for sensitive skin.
Now you can also get metal, stainless steel gua sha tools which can look a little intimidating but are excellent for giving a smooth glide across the skin with a cooling effect. They are also durable and hygienic to use as they won’t absorb any product like more porous natural stones.
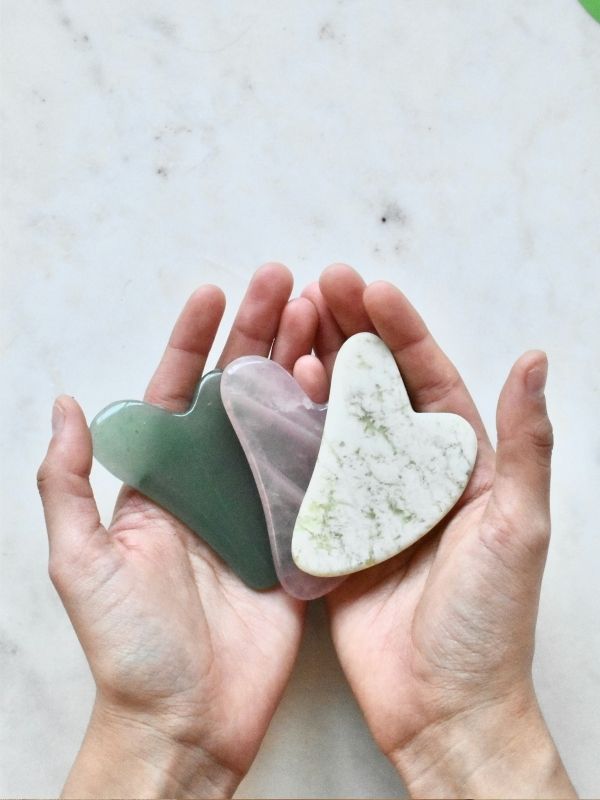
Jade gua sha vs rose quartz
My recommendation? If you’re a complete beginner, start with a natural stone. Jade for regular skin types or rose quartz if your skin tends to be dry or sensitive. Gua sha regulars or those with acne-prone/ oily skin might want to upgrade to a stainless steel tool once confident with massage techniques and pressure levels – this will be easy to clean and prevent bacteria spread.
There are also several gua sha shapes to choose from:
Traditional heart shape – great for following facial contours and cheekbones.
Comb edge – perfect for working up to the scalp and hairline.
Dolphin – smooth wide edges can be more gentle for the delicate eye area.
S-shaped – worth investing in for body gua sha across the neck, shoulders and arms.
If you’re looking to start with a basic gua sha facial massage ritual, you can’t go wrong with the classic heart shape. I have this shape and it’s perfect for working the neck, jawline, cheekbones and undereye area.
The Best Facial Oil for Gua Sha
The first step in any gua sha routine is to cleanse your skin and apply a facial oil or serum. Applying product allows the gua sha to glide smoothly and evenly, without tugging or pulling at the skin.
I personally prefer oil, as serum tends to dry quickly on the skin and has less slip. If you already have a facial oil in your collection, it should be fine to use this. Otherwise these are all great for gua sha:
ALL-ROUNDER
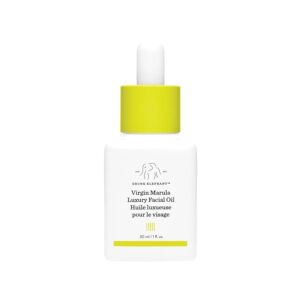
Drunk Elephant Marula Oil – My oil of choice. This refined oil isn’t oily or greasy, but still provides a good amount of slip for the gua sha. I leave it on my skin after each session for an extra layer of hydration in my skincare routine.
FOR DRY SKIN

Elemis Superfood Oil – This rich, luxurious oil is lightweight and smells heavenly! It will leave your skin feeling super soft and glowy after your gua sha routine.
FOR OILY/ACNE PRONE SKIN
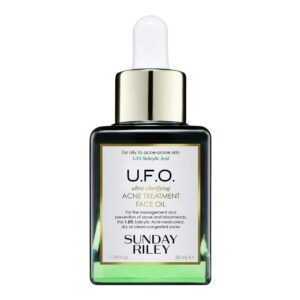
Sunday Riley UFO Salicylic Treatment Oil – This oil will treat acne-prone skin rather than irritate it. It’s perfect if facial oils are usually too heavy for your skin.
BUDGET
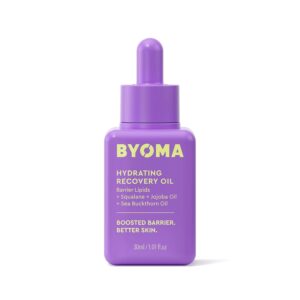
Byoma Hydrating Recovery Oil – This oil is nourishing and won’t break the bank. It’s also great for sensitive skin types.
You can leave your facial oil on your skin after gua sha massage and follow with your usual serums and moisturizers. Sometimes if I’m applying makeup afterwards I’ll wipe my skin with a damp washcloth to remove excess oil before applying SPF and foundation.
Gua Sha Techniques for Beginners
THE PREPARATION
Step 1: We’ve already covered this one. Begin by thoroughly cleansing your face. Pat dry with a towel and apply your facial oil or serum of choice.
Step 2: Now you need to stimulate your lymph nodes to open the pathways for drainage:
Collarbone: Begin by lightly tapping just above your collarbone with your fingertips. Spend 5 seconds on each side.
Jaw: Next apply light pressure under your jaw, again 5 seconds each side.
Ears: Gently circle your fingers behind your ears for a few seconds.
Now you’re ready to begin the best gua sha techniques.
HOW TO USE A GUA SHA TOOL
Take your gua sha and hold it at a 15-30 degree angle. Use light pressure.
Neck
- Take the gua sha from the hairline at the back of your neck down to your shoulders.
- Now from behind your ear down to the clavicle.
- And the front of your neck from jaw to chest.
Repeat each stroke five times on each side
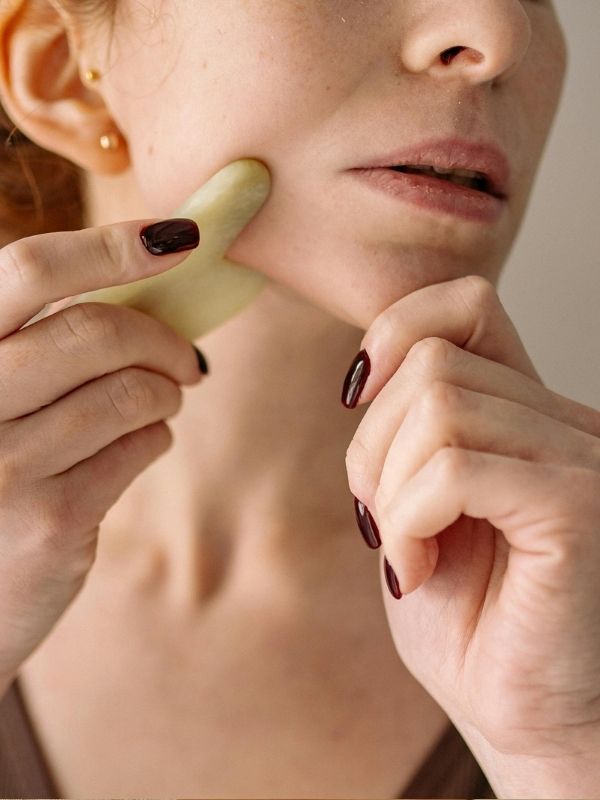
Jawline
- Run the gua sha from your chin to earlobe, following the jaw. Use the curved sides of the tool to follow the jaw bone.
Repeat five times each side
Cheeks
- Take the gua sha from the side of your nose, along your cheekbone to your temple.
Repeat five times each side
Brow and forehead
- Take the gua sha from your inner brow to temple.
- Now run it from between brows up towards your hairline. Then sweep from center outward.
Repeat each movement five times
How Often Should You Use Gua Sha?
A light pressured, gentle gua sha routine can be performed daily. I prefer doing it in the morning to enjoy the de-puffing results of the lymphatic drainage before going about my day, but you may choose to do it in the evening as part of your evening relaxation and wind-down ritual.
When Will I See Results from Gua Sha?
You should see immediate results from gua sha if performed correctly. As you go through the routine you stimulate lymphatic drainage, which instantly helps the face look less puffy and more contoured and defined. I personally also notice my face looks fresh and plump, almost slightly pink and awake from my gua sha routine; this is thanks to the gua sha movements stimulating blood circulation.
But how long will these results last? There isn’t much evidence of gua sha having lasting effects on the skin. When researching I came across a study conducted by Explore: The Journal of Science & Healing, showing that gua sha impacts microcirculation, with the microcirculation units increasing fourfold at the treated area for 7.5 minutes post-treatment, with significant elevation persisting for the entire 25-minute duration of the study.
This aligns with my personal observations: the effects of gua sha massage leave my skin looking great for 30 minutes each morning, but by the end of the day? I’m not so sure…
Some people swear that they have noticed significant lifting results from daily use, but I have not been lucky enough to see this yet.
So to conclude, you will enjoy instant results but don’t expect miracles when it comes to long-term use. That being said, there is certainly no harm in performing this relaxing ritual daily; it’s cheap to get started and it takes literally 5-10 minutes of your day- definitely worth a try!
Gua Sha Mistakes To Avoid
- Applying too much pressure: Gua sha requires only the lightest touch. If you drag the tool across your skin too hard, you risk causing irritation and bruising.
- Not cleaning your gua sha tool properly: The gua sha should be thoroughly cleaned after every use to avoid the spread of bacteria. Looking for gua sha tool cleaning tips? Wash with soap and water and leave it to air dry. I also recommend using an antibacterial wipe, or makeup brush spray to disinfect your stone once a week.
- Using gua sha without oil: It’s essential to use oil or serum before beginning your gua sha routine. This will help the tool glide over your face lightly, without pulling or damaging the skin.
- Working on inflamed or broken skin: Don’t perform gua sha on blemishes or breakouts. Not only will this be uncomfortable, but it could slow down healing.
Final advice
Be gentle! This is the most important thing to remember with gua sha. More pressure does not equal better results, so take your time and keep your strokes light.
Consistency is always best, so find a way to slot it into your skincare routine and keep it up. Just make sure to relax and enjoy the process.
Have you tried gua sha? I’d love to hear what you think about it.
You might also like:
7 of the best natural tinted moisturisers
9 best sunscreens for Tretinoin users